Friday, January 11, 2019

Repairing a Reuge Dancing Clown Music Box


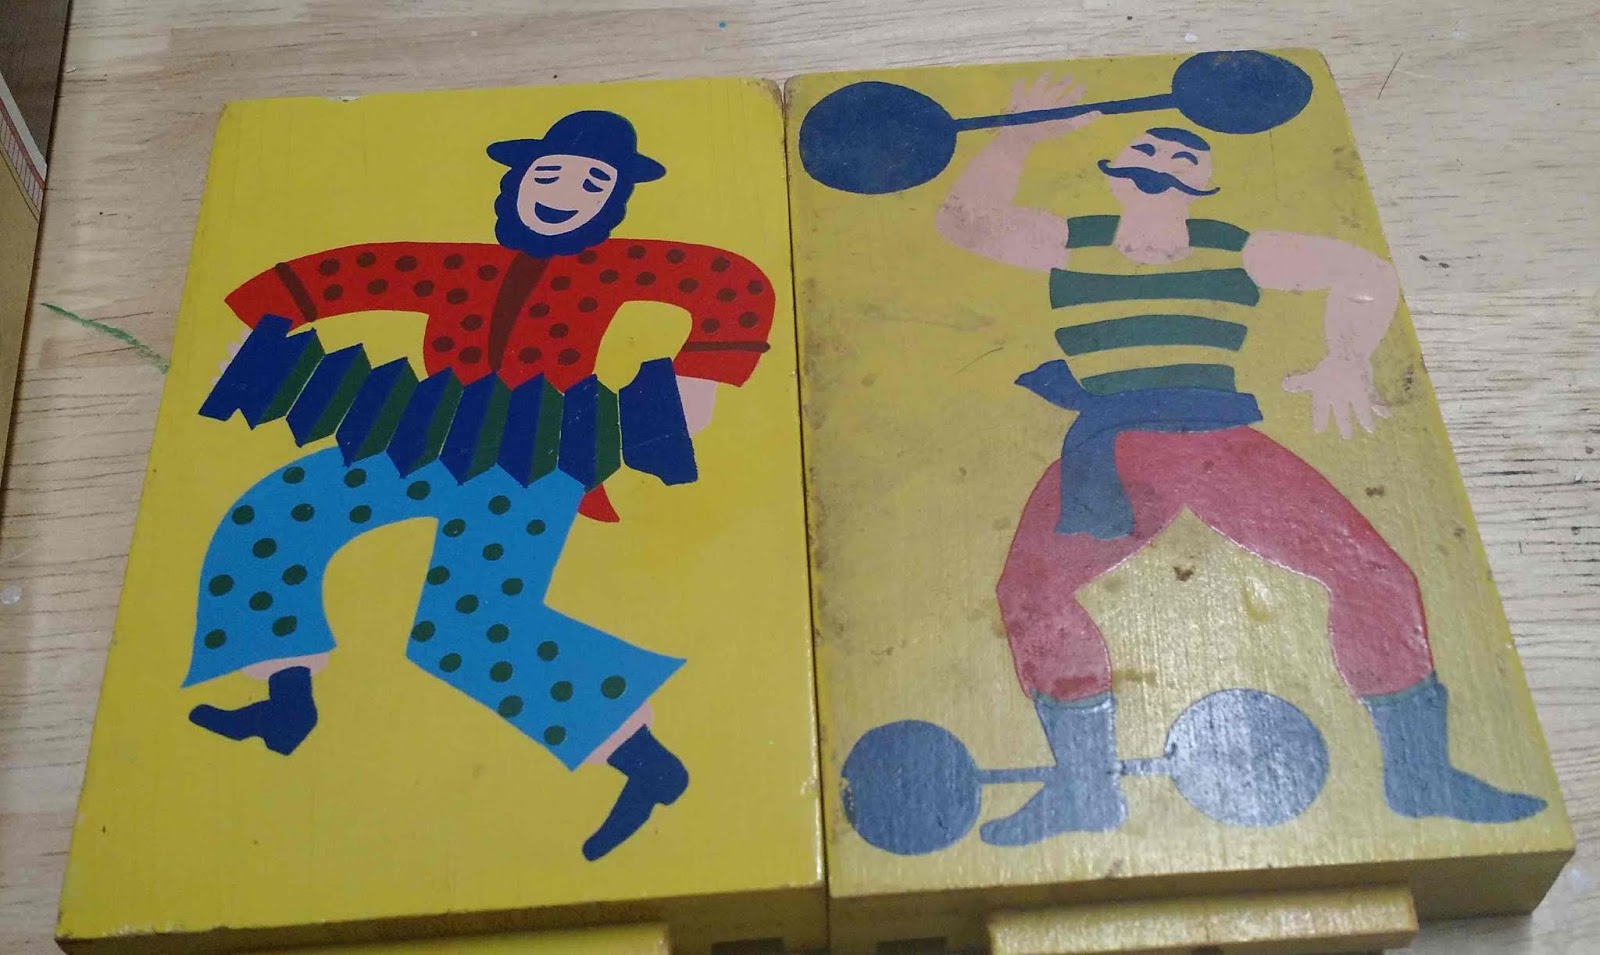
I had seen "Dancing Man" around my in-law's house since my wife and I started dating in the late 80's (Just to be clear, 1980s as opposed to 1880s.)

Dancing Man is actually a clown. He lives in a tent shaped wooden windup music box. The "Can-can" plays while he does a goofy unpredictable dance. (Actually, truth be told, the Can-can is the dance, the music is from Jacques Offenbach's Galop Infernal) It is a neat little action and he really seems to come alive with his body going one way and his legs every which way.

Over time though, his dances started to slow down and his musical accompaniment was missing a few notes. My in-laws asked if I would take a look and I jumped at the chance. I was really curious as to how he worked. I also knew how special he was to my wife and wanted some "Boy, I'm sure glad I married a  tinkerer man-child and not someone who was tidy and wealthy" attention.
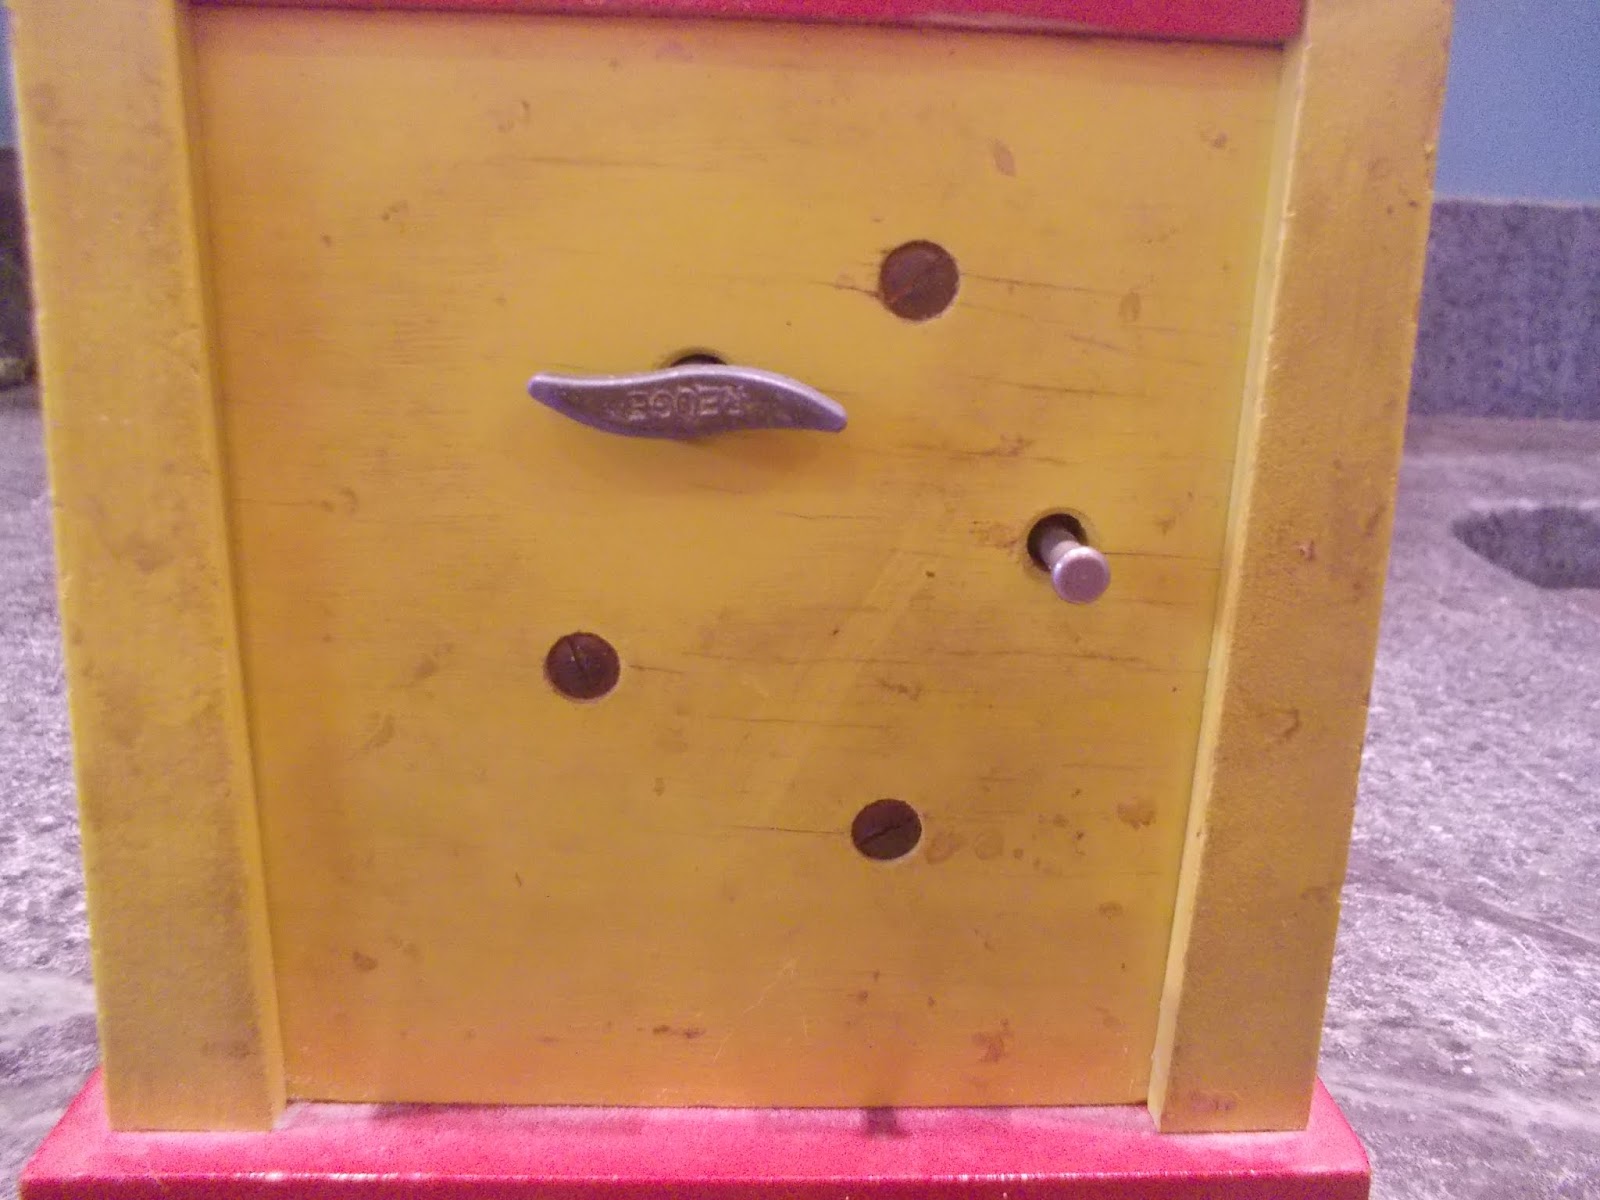
When I got him home and on the workbench though, I got cold feet. There were three screws on the back and two underneath. There didn't seem to be an easy way to remove the Dancing Man from the box. I had visions of unscrewing something and hearing various snaps and "sproings" as springs went in every direction. I set him aside. After all, the first words of the Toymender's Oath are "First do no harm."

So this fall rolled around and I decided it was time to take a more serious look and hopefully get him up and dancing for Christmas. I did a little research and thanks to the old sticker on his base found out Dancing Man was actually a music box made in Switzerland by the famous Reuge company.


I sussed out that the three screws on the back were to hold the musical movement in place and that the two screws on the bottom held the box together. Once I took the bottom screws out, I could see that the box was assembled with routed dadoes and rabbets.
The boards holding Dancing Man and the movement are made of plywood and the rest of the box is solid wood. Everything is painted. The decorations are not decals.

The Dancing Man's dance motion comes from a bent wire that is held in place by a screw on the musical "comb" (more on that later.) The end of that wire is moved by a very small cam. That cam sets up the irregular motion of the the Dancing Man. I was able to get a screwdriver in sideways to gradually work the screw out that held the wire from Dancing Man. Just a 1/4 turn at a time being careful not to damage anything.


  1. The cam that sets off the irregular dance
  2. The drum spins and those pins are the pattern for the song. Notes play as those pins pass through the comb.
  3. The comb. Several teeth appear to be missing.
  4. The empty screw hole that holds the wire and clip that makes dancing man dance.
  5. On/Off pin. Pushing it in from the back of the toy pushes a wire that interrupts a small spinning fan causing the movement to stop.
  6. If the fan can spin, the music plays. When it stops, all music and motion stop.
  7. The spring. The winding key is is on the other side of the plywood.
In researching I found that the main reason for music box slowdowns is that the movement needs to be lubricated. It may be that old lubricant has solidified or gotten dirty. Several spray lubricants were mentioned, at least one of which had to ordered by the case! Ummm maybe if I was in the business of fixing every music box ever!  I eventually purchased a single can of spray lubricant intended for aluminum windows. Although the movement is clearly not aluminum this sort of lubricant was what was called for.

After using some rubbing alcohol soaked cotton swabs and compressed air to give it a general cleaning, I moved on to the spray lubricant. I sprayed some into a plastic cap and then used a small artists style paintbrush  to dab the lubricant on to the various gears.The difference in the speed of the movement was immediate.

Original on the right
Replacement on the left
The next issue was that he didn't sound right. He was playing too slowly and the lubricant had helped that but notes seemed, even to my tone deaf ears, to be missing. There were clear gaps on the comb.

While it is possible that the missing teeth are by design, it didn't make much sense. Why remove teeth? If you didn't want to play a particular note, the pin on the drum for that note could have been left off. This music box was sold with several other song possibilities and that would be handled by using a different drum. No need to customize the drum and comb for each combination. 

I purchased a set of Reuge replacement combs on a certain online "auction" site. The replacement comb was the same size and had the same number of teeth as the original but the screw holes did not match. Here is the old one on top of the new one. Grrrrrr.

Lucky for me a wise crustacean just happened to be at my place during his football team's bye week and he set about reshaping the hole with some very fine needle files. Both holes needed to be adjusted. I wanted to fire up the rotary tool but slow and steady wins the race and saves the day on this.

Next came dozens of attempts to adjust the comb just right. Most of which were wasted since I knew I'd have to take at least one screw off for final assembly. Eventually I had to just take the leap and hope for the best on final assembly.

Crawfish had suggested just a soft cloth and warm water to clean the 40+ year old box. I was pleasantly surprised to see how effective that was. It had really held up well under the day to day dirt. I didn't try to touch up any of the paint. He had be played with a lot of over the years so he had earned any scars.

After I reassembled him I needed to replace the little balls that marked the top and corners of the tent. Only two of the original five metal balls had survived the years. The ones that were left were 9mm brass balls with tiny rods that fit into holes on the tent.  I had to laugh that when I searched for "9mm brass" on the internet; I immediately got a lot of ammunition hits in my search results. Changing the search to "9mm ball" didn't help since that is an ammo term as well!

So a friend of  mine, who pretty much has the entire contents of a Hobby Lobby in her basement, hooked me up with some 3/8" wooden balls. Not exact but close enough. Since I wasn't using the originals, you won't know they are a little bigger. I used a drill press vise to hold them in place while I drilled a 1/16" in hole in them. I glued a small nail in place and then cut the heads off the nails. Instant rods.

I used metallic gold acrylic paint and then finished them off with  a top coat of high gloss spray acrylic. I then used tiny dabs of hot glue to hold them in place. I didn't want to epoxy them in case someone wants to do a true restoration. They look like they belong.


Here he is as he was initially playing along with a look at his music box and one of his post new comb tests.

And here he is all done.

On Christmas, my in-laws were pleasantly surprised and genuinely happy to see Dancing Man back in action. They have certainly been amazing to me and my family over the years so this was one of those times where there was certainly joy in the giving. It was fun to work on and very satisfying... and that fact that he sorta creeps my sister-in-law out was an added bonus!

Sunday, May 20, 2018

Making a Whirligig Repair

Whirligigs are something that have always interested me. They have that great folk art vibe and are almost always "whimsical" in nature. I have a couple of books of plans but haven't managed to build one on my own yet.

Well, that's not entirely true. I haven't managed to successfully build one yet. I worked on a penguin a couple of years ago and carved a couple of surprisingly elegant flipper/wings for the little guy that simply refused to work. After a year on the shelf, he was sentenced to the burn box out of frustration.

A few months ago a friend asked me if I would be willing to try and fix "Dee Daw" for her mother in law. Dee Daw is the name for their wooden goose whirligig. Apparently Dee Daw had a long, much beloved history with this family but he (she?) was on his last legs (wings?) I said I couldn't guarantee success since I had failed at my last attempt at a whirligig but I was willing to give it a shot. Dee Daw came home with me a few nights later and waited patiently in my shop for his turn.

So fast forward to a couple of weeks ago and I found myself lacking in pressing home and family projects and completely absent any excuses for making sawdust. So it was time to unpack Dee Daw and see what the deal was.

In short... both wings were broken and at least one piece was missing. He was also missing an eye and his finish was very rough and flat. Dee Daw had clearly seen better days.


It looked like either his wings had been repaired before or that had been made from glued up boards and were not solid pieces. In either case, I decided that they couldn't be fixed and needed to be replaced.


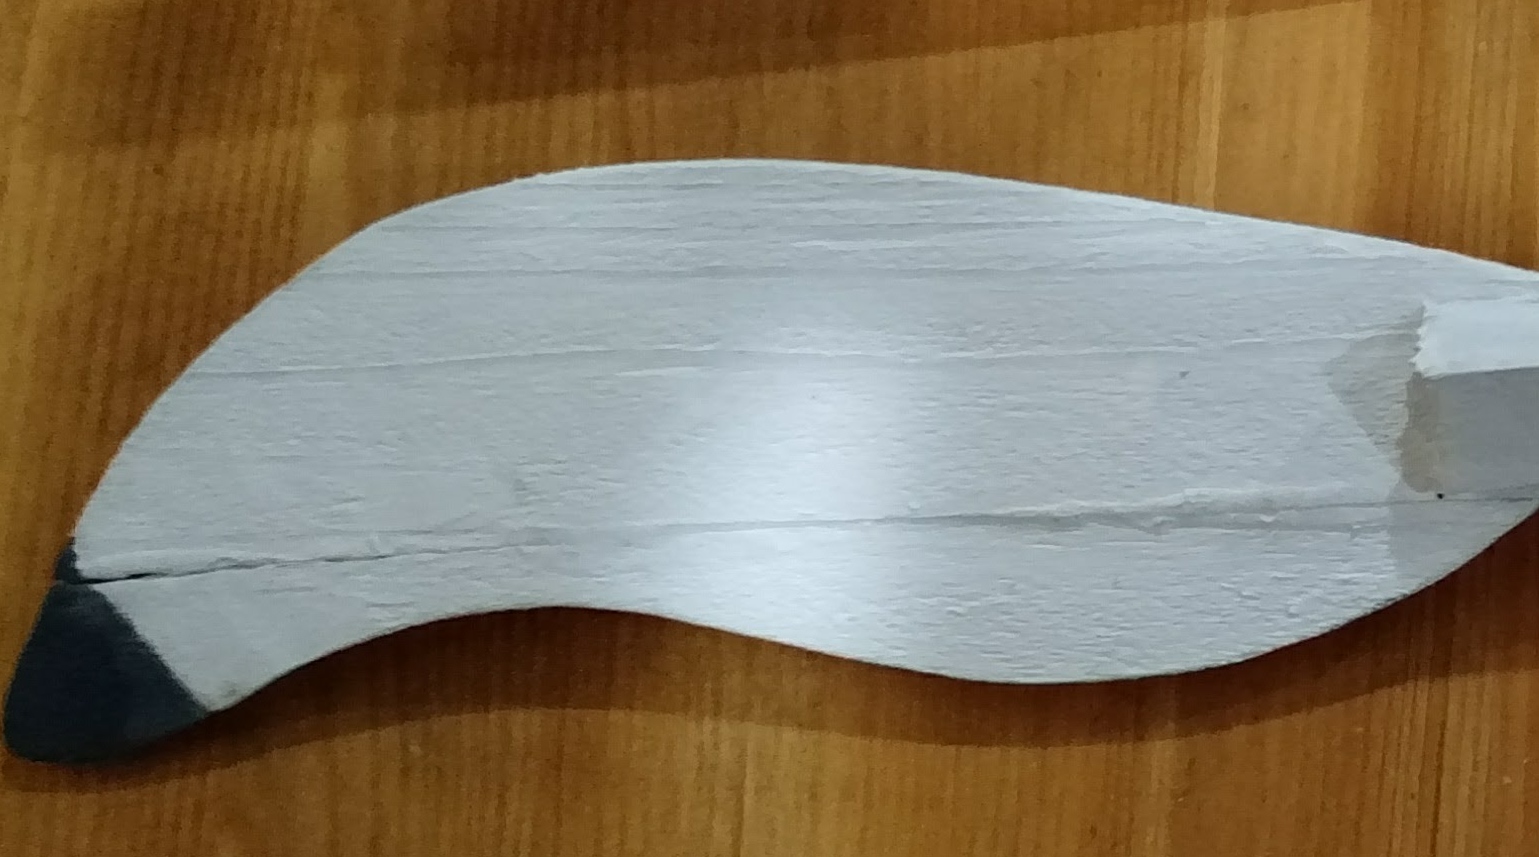
Each wing is made of three pieces. Two flat blades and a central wood block. I took the wing that was detached from the wooden block and used it to trace a template. I allowed for the piece that had broken off inside the block.


I used 1/4" thick solid boards from the bottom of a wine crate for his new wings. I couldn't see 1/4" plywood holding up to the weather but... what do I know? Anyway I cut the wings out in pairs on the band saw to save time and to help ensure balance on the wings by using pieces from the same board for each pair of wings. (Each wing shown here actually has two layers for a total of four blades.)


The original central block on Dee Daw was 1" square and 3 1/4" long. There is a diagonal cut 1/4" wide and 1" deep on each end that are angled opposite each other. There is a hole through the middle and there is a #10 2 1/2" wood screw with #10 stainless steel washers on either end. It is really a bit of genius design here in that the screw has a smooth shank that allows the wing to freely pivot around the screw with a minimum of resistance. Although this is in direct contrast to that fundamental principle of web design - "Why make it simple, when we can make it complex?"


At this point I noticed that the diagonal cuts on these wooden blocks weren't...GASP..perfect! ASTONISHMENT!
You mean to tell me that folk art whirligigs don't need to be engineered to within 1/1000th of an inch and perfectly balanced?
Well, apparently not. Clearly the more precise you are the better but close enough appears to be... well.. close enough.


So with my new found frame of reference and my recently created outdoor workshop, I realized I can experiment. Every moment spent on a project doesn't have to show in the final product. If it works, great. If it doesn't, well I learned something and there is always the fire pit to destroy the evidence. (That's why everyone has fire pits now. Way more cost effective to destroy your own evidence.) I took a piece 3/4" thick wood and cut and ripped it to be 3/4" square and 3 1/4" long. Not the exact dimensions of the original but now I realized it didn't have to be.


I had a jig made out of the 45 degree angle blocks from what else... clementine boxes! I marked off the areas to cut and the correct depth.
I just held the block in the right angle formed by the "v" of the two clementine box corners glued to a plywood base. (You could also use a dovetail or fret saw and a vice to achieve the same thing.)


The width of the cut was 1/4" to match the wings. I made several passes with the saw to nibble away at the pieces and then used a file to clean up cut and get a flat bottom. I then drilled the holes through the centers to fit the shinny new #10 wood screws.


I should also note that I made cryptic little scribbles on the blocks to keep then aligned to match what was originally on Dee Daw. This block has "RI" written on it to mean "Right Interior." The angles on the wings and their relative position to the other wing are what leads to the contra-rotating motion of the wings. Later when I painted the assembled wings, I pressed in a L and a R on the interior sides of these pieces with a small screwdriver. That way the marks showed after paint covered my pencil marks.


I sanded the wing blades to make them smooth but also to get the thickness correct. I mainly used my stationary belt sander for the thickness part but earlier on I used a palm sander. A few years ago I picked up a 60' long blue roll of "non-slip shelf liner" from a dollar store (just saying.. it actually only cost $1) Works great for me. It is soft and the dust falls into the mesh and is easy to clean. Wood doesn't shift around while I'm sanding. I should buy more...and just cover every surface in my house with the stuff. I see no downside.

I was careful to "sneak up" on a good fit and then used an exterior wood glue to secure the wings.
After letting the glue dry overnight, I put the wings back on and took him out for a test spin.
The wings started spinning almost right away in a moderate breeze. I was super happy. Now it was time to repaint and finish him.

The wings were straight forward. I used craft store acrylics and got great coverage.

Hey... do I not own the greatest coffee mug in this or any universe? Handmade by the amazingly talented and super nice folks at Claymonster Pottery. I smile a lot in general, but especially when I drink from that mug.

Now... back to our post.


When I first took a look at him, I couldn't tell if he had a finish that had worn off or if was just a flat finish that was showing some age. The other possibility is that he was intentionally finished this way to give him a more folksy look. Whatever the case, the owner asked me to give Dee Daw a fresh shinny new paint job.


I used some filler on the more obvious cracks and sanded everything before I painted him. Most of my paints are flats (I find it hides hides brush strokes well) and then I add a shinny finishing coat. This time the grey (or was it gray?) paint was only available in "Multi Surface" and it goes on a little thick and tends to be a little shiny on its own. No worries though. Once dry I covered him with brush on Rust-oleum Ultra Cover Clear Gloss. I usually use a rattle can of acrylic but I felt like he needed a more substantial coat to stand up to the elements (This is my first outdoor toy. Never thought about toys standing up to the elements.) Note - It works great, but it does run if your aren't careful... and maybe even if you are.

Last thing was to glue on nice new shinny eyes and take him out for a test flight.

He works great. My friend and Dee Daw's owner were both super happy with how he turned out.
I learned a lot, it was fun to work on and I can't wait to give making one from scratch a try.

For the visual learners - Here is a short video of some of the repair steps and Dee Daw's test spins.


I managed to go the whole post without a history of whirligigs or mention of the word's derivation.
However, I can't legally complete this post without noting the technical assistance Dr Teddy provided. While not a fan of birds... ESPECIALLY BIRDS ON HIS LAWN... he is a professional and takes his job very seriously.

When the patient was being worked on...Teddy provided the Cat-Scan.

Later while he napped he had the intern he is mentoring keep watch.


She also helped me test gravity in our dining room by pushing various parts off the table.
He is mentoring her well.

Monday, January 1, 2018

Making a Toy Grasshopper from a Sycamore (Log to Toy)

Forget about Farm to Table. I've finally entered the world of Log to Toy. These grasshoppers were the first toys I've made where the main parts of the toy were from a log as opposed to some finished piece of lumber I had acquired.

Here's how it happened...
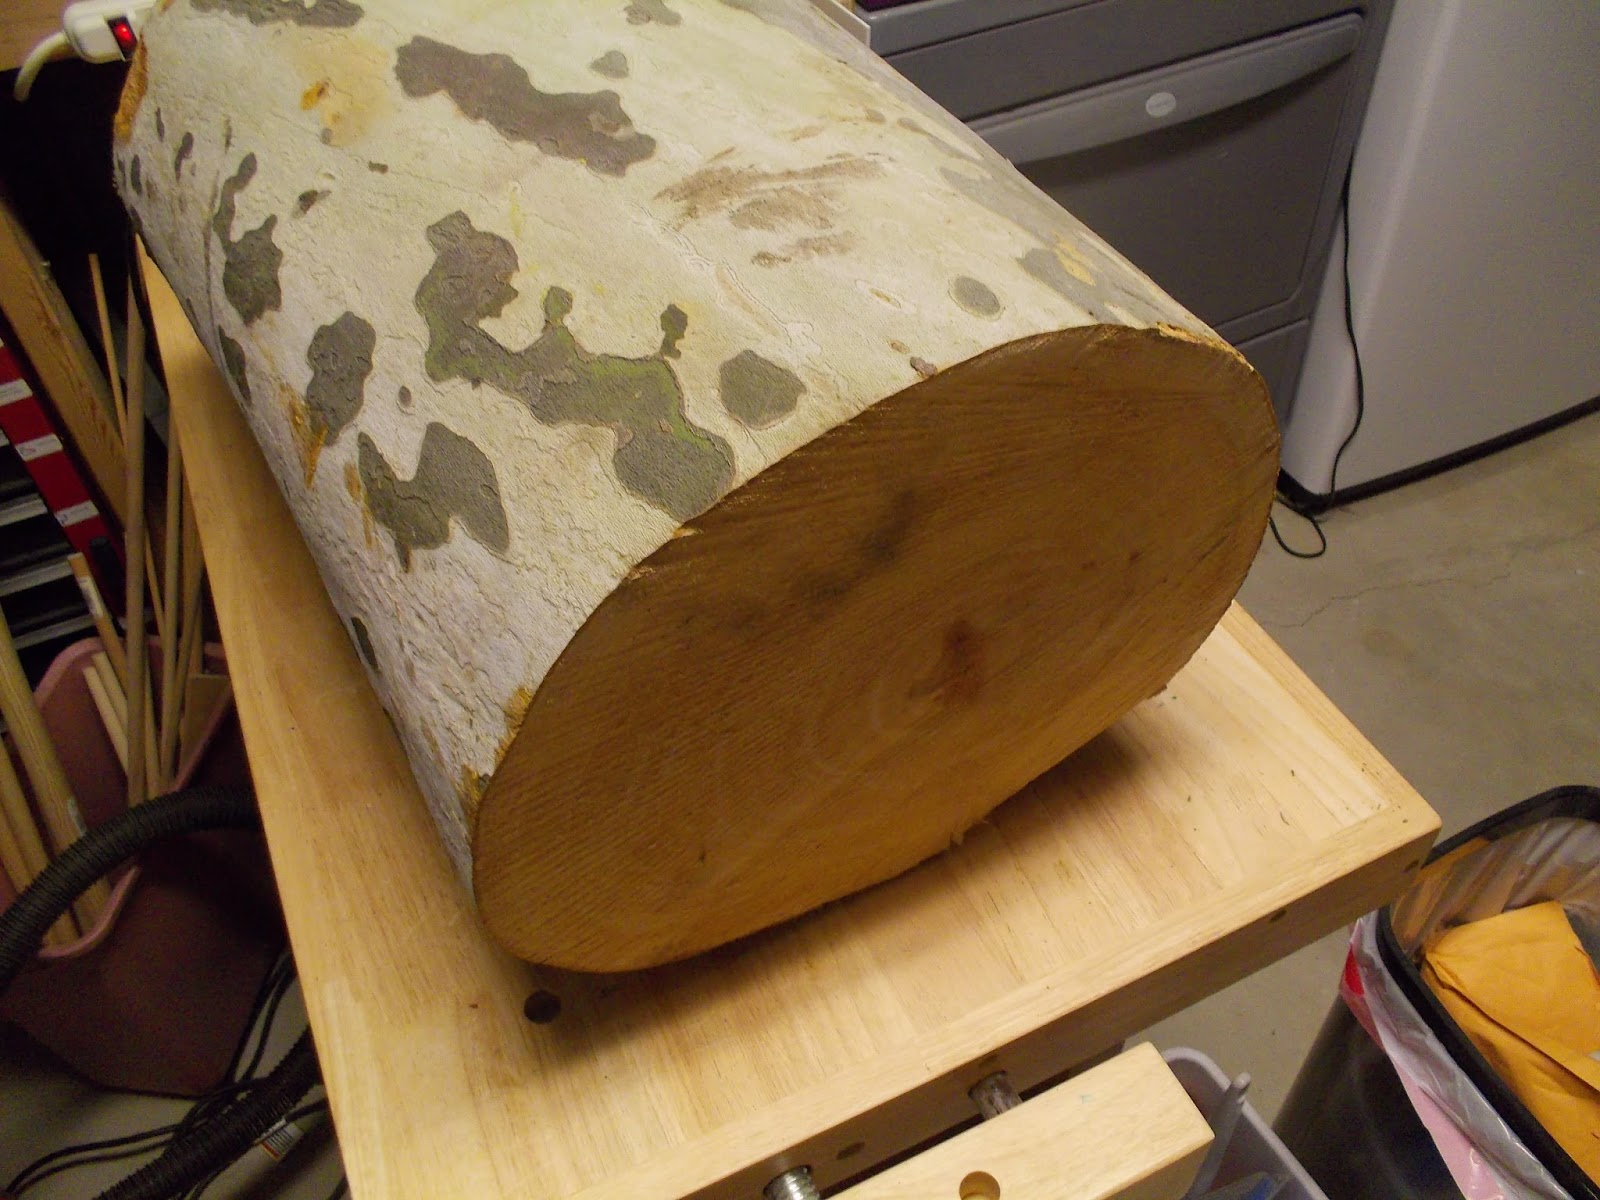
About a year and a half ago I was walking to my car and passed a public park. There on the sidewalk was a big pile of rather substantial Sycamore logs. They had just been cut that day and were piled up to be turned into mulch or some such inglorious fate.

I pondered a few moments about what I would actually do with one of those logs. A quick interwebs search on my phone (crazy world huh?) said that Sycamore are pretty much impossible to split but good for carving spoons out of. Ummm..okay. I am sorta interested in learning to carve and spoons are a pretty practical thing to have around. So next thing I know I'm hauling a 20"x 14" log that must have weighted 85 gazillion pounds into my car.

When I carried it into my house and announced I was going to make a spoon out out it, Mrs Toy Making Dad gave me the "his descent into madness is accelerating" look. I painted the ends with latex paint and set it aside. I dreamt of spoons and ladels that night.

As to those know-it-alls who say that Sycamore can't be split I say... you guys are absolutely right!

The crime scene photo
It was an exercise in brute force and pure stupidity to eventually get it in half. It took the better part of a weekend using a chain saw, a maul, iron wedges, hand saws and wooden blocks. I'm not kidding, nothing like using the wrong tool for the wrong job. It was a mess but it gave me something to work with. It is the nature of the grain that prevents it from splitting. It also makes it warp like crazy when drying unless the pieces have been quartersawn.

The only thing better than having a high quality bandsaw is having a friend with a high quality bandsaw. So I dropped Crawfish a line. I whipped up a simple sled to fit his amazing Rikon bandsaw and then he and I spent a few hours in his dungeon cutting the log into boards. It was a ridiculously good time.

Somehow we managed to quarter saw some of the sycamore and my jaw, and his claws, just about hit the floor. Wow. The grain was like nothing we had ever seen. (Well, at least not on this planet.) So that got me thinking. (Which is usually pretty dangerous.) Yes, I can experiment with spoons but the pattern on some of the 1 1/2" thick board was pretty amazing. Seemed a waste not to show it off.

When I got the wood home, I sealed the ends with some Anchorseal that Crawfish generously shared with me. When it was one big log, I had just used some leftover latex paint. It is super important to seal the end grain of green wood with SOMETHING otherwise you will get end grain checking/splits. Don't believe me? Check (hehehe see what I did there?) out these two sides of the same piece of wood. The splits showed after just a couple of weeks.

Sealed

Not Sealed


So I stacked and "stickered" (put spacer sticks to allow airflow around the wood) the sycamore boards and put them on a shelf out of the way to dry over the next few months.

Fall rolled around and my neighbor sold me his Jet Joiner/Planner combo machine and one of the first things I tackled was the sycamore boards. I decided to make some grasshopper toys out of them since Christmas was coming up. (Here is a post on how I make those toys.)

According to my moisture meter the boards were ready. The Jet was super easy to use and in no time I had some sycamore boards that were exactly 1 1/4" thick and had a side that really showed off the quartersawn grain pattern. The wood cut and sanded fine. I had one piece that showed a little tear out on the grain but I'm not ready to give up on that piece quite yet. 

I experimented a bit with finishes again. From bottom to top these are unfinished, beeswax and mineral oil and then Danish Oil "Natural" along with some beeswax and mineral oil. Beeswax and mineral oil is non-toxic and easy to work with.


They toys went together super easily. The legs ended up being red oak left over from my neighbor's shed. He got an amazing deal on 1x6 boards from a family run sawmill on MD's Eastern Shore. Whole 8' boards were just a few dollars each and it really goes to show the price difference between buying finished lumber and "making your own." Yes it has to be dried and surfaced, but still, this is a hobby and I've got time. I don't always have money. Just saying.


I've gone on several times about how much I like using the beeswax and mineral oil finish for toys. I believe these wheels are birch (I get them from Woodworks Ltd.) Look at the difference it makes and all without any fumes or added stains.

So not 100% Log to Toy but I don't see myself turning pegs that I can buy for 5 cents each or making dowels anytime soon. Maybe I should raise my own bees though to get that beeswax...

As always, my quality control supervisor assisted with this project. Here he is performing a cat-scan on the log and trimming a superfluous branch.


Not sure it would have been possible to make these without his help.


Sunday, December 31, 2017

Making Toy Grasshoppers

These grasshoppers (and ones like them) have been a real go to gift for me over the last few years. Simple to make and really satisfying to finish. You can knock a few of them out over a weekend and are a great project that doesn't require any special tools or complicated techniques and jigs.

So before I share a few tips, here is my backstory with this toy.

The first one I saw was when I was in college. There was a Christmas craft show set up in the Student Union Building and I purchased one for my niece. I really liked how the legs moved and the classic look it had. (This was during the time I thought I'd never want anything to do with wood working or power tools...aka my "Idiot Years.")

So fast forward 20 something years and I acquire odds and ends of tools, a little experience and a mini library of toy making books. One of them is Jim Makowicki's Making Heirloom Toys. It is a great book with easy to follow illustrations. One of the plans is for this grasshopper. All of my grasshopper are pretty much straight forward from those plans. I highly recommend that you pick up a copy if you want to make some of these.

I'm not going to include a plan here since I've followed Makiwicki's plans for all the ones I have made. If you want to make one and don't have or aren't going to get the book, give this video and download on the Wood Whisper site a look. It is a little different but the same basic idea.

I do a couple of things differently than Mr Makiwicki does. Namely:
  • No antennae 
  • No pull string.
  • For the through holes in the legs, I use a 15/64" bit
  • For the stopped holes in the leg, wheel and body, I use a 7/32" bit
I changed the hole sizes to be a better fit for the pegs I use. The lack of antennae and string are because I like to keep it 100% wood. That's just me.

The "through" holes need to be loose enough to allow the leg to pivot around the peg. The others holes are "stops" that the peg needs to seat firmly and be glued into. My latest batch of pegs needed to be trimmed to length but fit nicely in the leg holes. I found that making a die and checking the pegs beforehand was a big help. If the peg is a little thick, forcing it into and back out of the proper sizing hole saved a lot of sanding and hassle.

The pegs and wheels are purchased from Woodworks Ltd. The pegs are about a nickle apiece and are solid. YES, I could make them but they wouldn't be as nice or as cost effective.

As with making all toys (and maybe all woodworking for that matter) the big time sink is in setups and not so much in cutting. After I made my first one of these I realized that going forward it was silly not to make at least two at a time whenever I was making them. Besides only having one setup on the drill-press and bandsaw, it also lets you get into a rhythm.

So, I've probably made and given away eight or ten of these over the last few years. Several of them to charity auctions. The first few I did I just used a piece of construction 2x4 for the body and painted it with craft store acrylics and then coated with spray gloss acrylic. They come out nice and really have that toy "vibe" about them.


Since I lack imagination, my painted grasshoppers have always been green. In my non-creative skull, grasshoppers are like tanks. They need to be green... or camouflaged. Otherwise, we are just living in Cloud Cuckoo Land.

Over time when I got some nicer wood (in this case maple for the body and red oak for the legs) I finished them with mineral oil and beeswax. I love working with that stuff. Besides the fact that I whipped up a 1/2 quart or so of the stuff for next to nothing, I love that it is non-toxic, actually smells nice (almost like honey if you ask me) and is super forgiving.

Here it is half applied to a piece of maple. You can see the warmth it adds. However, it isn't a stain. The oil penetrates and preserves the wood but it isn't going to protect the way a hardcore finish will. The trade-off of a great look, feel, added safety and ease of use all make it a good choice for me. Lots of places to find the formula and safety tips on the web but I found mine on a Wood Toymaker video link here.


The eyes are 1" dowels. Since I don't have a lathe,  I "turn" them using my stationary belt sander. I'll take a long length of 1" dowel, hold it it at angle against the belt sander and keep spinning it in my hands while changing the angle slightly. Keep you hands away from the belt and have the dowel facing "down stream" so it won't catch on the belt. It only take a minute of so and you have a rounded-ish end. I usually finish the rounding with a palm sander. Then you just cut it to length. I've experiment with Danish Oil, black paint and just the beeswax and mineral oil finish on the unpainted grasshoppers. All seem fine. Whatever works.

Speaking of works... here are a couple of them being tested out:


So there you go. Again, these are easy to make and make wonderful gifts. I recommend picking up a copy of Jim Makowicki's Making Heirloom Toys but if you search for plans on the internet, they can be found along with design ideas if you want to give creating a design of your own a shot.

Last tip - It never hurts to have another set of eyes (and paws) to make sure everything is coming together properly. All those parts aren't gonna knock themselves on to the floor.


Just Saying...

While we don’t necessarily need more objects, we just might benefit from more making.
- John Dunnigan

Followers

About Me

My Photo
Regular guy who likes to make stuff who lives with a very patient wife, three daughters and three cats.