Making a Toy WW1 Tank (Part 4)
The sponsons on the sides are a defining feature of British WW1 tanks. I want them to move but still be sturdy. It would be nice to have the gun barrels move left and right as well as up and down, but at this scale they would have been a little fragile and probably a bit droopy. So a few doodles and a test cut or two later a pretty simple solution came up.
| Drill all the way through and make sure you have a thick enough piece of scrap under it. | Simple jig that makes it easy to hold any size dowel in place. The triangles are glued down. |
I cut the large dowel down to about 1 5/16" with the 1/4" hole being in the middle. I didn't want too tight of a fit because I want the gun to rotate without binding. With the barrel dowel in place I checked the fit and marked the widest point in the arc of the barrel rotation and then made straight cuts with the bandsaw. I tested the fit and made sure the larger dowel could rotate freely but not be pulled out to the front. Then I trimmed the sponson to the rough width and length.
| I rotated the barrel through 90 degrees and marked where I need to make the cuts. | Here is the "rough cut" of the sponson along with the 1/8" plywood that will make the roof and floor. |
I used clementine wood that had printing on it for the roof and floor. I just made the printing inward facing because often that paint will "bleed" through the acrylic craft paint I use to finish toys. (Note to self - look for non-toxic primer.) I have plenty of clear wood I could have used, but I wanted to leave a little proof on a hidden inside part of the tank that this had been built using food box wood. It might seem psycho, but I felt like it was a little "shout out" to Homer McNeil and his toys.
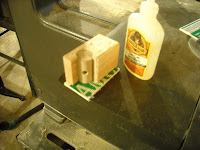
| Use enough glue to get a solid seal all the way around. Use clamps and be sure not to get any glue on the dowel that holds the barrel. It needs to be able to rotate freely. | Don't glue the barrel in until after the top and bottom have dried and you have finished shaping the sponson. |
I used a combination of the bandsaw and belt sander to get the final shape I wanted. There was a wide range in the shapes of the sponsons on the British tanks depending on the model number and the number of guns it carried. The next one I build might have a smaller dowel and barrel towards the back to house a machine gun. Anyway, mine doesn't match an exact version, but it captures the general idea.
| Obviously, you'll need to make two sponsons. Make sure that your cuts and sanding match up. Now you can glue the barrels in. | |
Here we go, the home stretch. I painted it olive drab with the red and white recognition stripes at the front.
I glued and clamped the sponsons one at a time so that I could be sure to line them up how I wanted them.
I did change the location of the nylon clacker to the back of the tank and held it in with a small brass screw. It sounds better clacking "in" rather than out on the gear and it looks like it will be less wear on it. (Actually, I'm gonna keep an eye on it to see if it holds up. I might experiment with a thin metal one instead.)
| A scornful look from a black cat isn't required at this stage, but it seemed to be help. | The infamous "clacker" in place. Cut from a surplus nylon Venetian blind slat. |
The large letter/number combinations at the front of the hull were unit identifications in WW1. The smaller numbers at the back were tank serial numbers. I personalized the tank for my friend's kid by making his birthday the serial number and used a play on his name for the unit ID. I painted the letters and numbers using a very fine point brush and... yes... a toothpick.
| The tops of the tracks are painted grey. | I did add small driver shields and painted small slots on them. |
The last thing I fixed was the machine gun. I really didn't like how the 3/16" dowel looked. To fix it I drilled a 1/16" hole in the center of it and then expanded that hole with a 1/8" hole (doing it like that prevented splintering) and then put a piece of 1/8" dowel into that hole.
After the painting was done, I gave it a coat of spray acrylic and then gave it a test run on the floor.
All in all, not so bad. Nothing too tricky (although there must be an easier way to make the clacker... just saying.) Without the paint, I think this could be knocked out over a weekend without any problem.
Here are the rough plans as a cutting guide. BE SURE TO SET THE IMAGE TO PRINT LANDSCAPE! The tank tracks should be a little over 8" from tip to tip. I tapered the back of my sponsons but like I said, I might add smaller guns at the rear on the next one. (And there definitely will be a next one.)


0 comments:
Post a Comment