Ladder Toy Repair
If you are not familiar with them, it is basically a 90 degree vertical ladder with evenly spaced rungs. A peg or character with specially cut holes and grooves on it is placed on the top rung and then allowed to fall down the ladder one rung at a time.
It is a really pleasing motion and it is fun to watch the peg fall back and forth as it tumbles down the ladder and never falls off until it hits the bottom. The trick is that the peg (or monkey, or clown, or whatever) can't fall to the next rung until it is perpendicular and can't fall out of line once it is lined up. It is a pretty ingenious idea.
Anyway, a few months ago a friend told me a story about how one of her friends had given her and her daughters a wooden tumble down the ladder toy about 35 years ago. The toy had gotten plenty of use over the years and was now a little rough for wear. In short, it was broken. She also mentioned that her grandson has tried to play with it when he visits, but because of missing and damaged rungs, it simply doesn't work.
Since there is nothing sadder than a broken toy except for a broken toy that a kid is trying to play with and can't... I offered to take a look and see if I could fix it.

Here are the specifics....
- 26" Tall
- Base is 1 1/4" thick and 5 1/4" in diameter
- The long verticals ate 11/16" x 11/16"
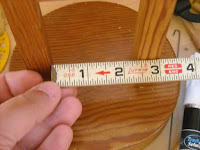
- The rungs are 10mm (or maybe 13/64"????) tall, 1/8" thick and 2 7/16" wide (well, that's the distance between the uprights.)
- There is a 2 1/2" gap between each rung.
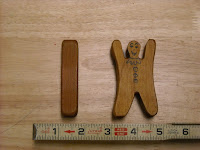
Somehow I failed to measure the height of the pegs, but my guess is that they were about 3" tall. Long enough so that when they fall to the next rung, they will just clear the rung above before they start to tumble to the next rung after that.The pivot holes are 7/16" in diameter.
So first impression when I started looking over the toy was that it was really solid and really well made. One rung was missing and two were damaged. The rungs are plywood but everything else is solid wood. I wish I could tell you what it was made from, but that would just be a wild guess.
I noticed a bit of a "ghost" on the bottom of the toy. It looks like it may have been the name of the original maker or some sort of brand name. It appears to be adhesive residue. Needless to say, I am curious as to what this says or means. It is hard to make out but if you know what it is, or have a guess, drop me a line.
|
|
As I said, the top rung was missing and needed to be replaced. I noticed another one was broken enough that it would prevent the peg from falling properly and that one other was starting to break. I figured it made sense to just replace all three.
|
|
No worries. The secret ended up just being patient and remembering the woodworking truism that you can always remove more material but you can't ever add it back on. I got to live the dream sitting at my workbench, listening to the Washington Nationals' game on the radio and drinking a Mexican Coke. Brothers and sisters... it don't get no better than that.
It was great to use my workbench as... gasp... a workbench! Not just a horizontal surface, but a bench designed to help facilitate actual work. It has an end vice and I used some soft dollar store shelf liner to cushion the toy. I mainly used a rotary tool with a very small bit it clean out the holes a little at a time. An Xacto knife and some rather evil looking dental type tools also came in handy.
I cut a little mini rung to check fit. Here is the basic process for us visual learners...
|
|
|
I did that for all six of the holes. After I was finished I went to test fit an 1/8" plywood rung I made out of the onion of the frugal woodworker world... Clementine Box Wood! As I was test fitting it, I wasn't happy with how sturdy it seemed. More specifically, I wasn't happy with how flimsy it seemed. It didn't make sense to spend the time to fix the toy to only have it break again, so I acquired some 1/8" maple and cut it to size.
I had to experiment quite a bit to get a close match on the finish for the wood. I seem to have the worst luck trying to match finishes. The way it looks on the can is NEVER the way it comes out for me. Anyway, the rungs were eventually finished with Danish Oil and a touch up pen. The match wasn't perfect but it was close enough and I was sorta, kinda, happy about it.
Last step was putting glue in the mortises and slipping in the new rungs. They were a tight fit but all went in without too much trouble. One of the secrets of getting this sort of toy to work is to be sure that the rungs are parallel and equally spaced. I made a little spacer out of.. .Clementine Box Wood! Note the exotic wooden spring clamps I was able to employ. Right tool for the right job.
After it dried all I had to do was test it.
And I tested it a lot :)
Here is the completed toy in action -
It worked fine and hopefully it will hang in there and last for my friend and her grand kids for another 35 years.


Thanks for the ladder toy information. Am making one and wondered why the steps were square.
ReplyDelete