
Making a Spoked Wheel (Part 1)
I know, I know, you can buy wood toy wheels pretty cheaply. Nothing wrong with that. I use pre-made wheels all the time because they look good and get the job done. However, sometimes, they simply don't have the look I need for a particular toy. Case in point - the Spoked Wheel.
 You can buy spoked wheels like this online or in just about any craft store for anywhere between $.50 and $2.00 apiece. (Wait a minute.. $2.00 apiece??!!!! That's crazy talk! Why, a man should be able to buy a new suit for $1.50... $1.75 if they throw in a tie.) They look fine if you are making a MG or Model T but I have something else in mind.
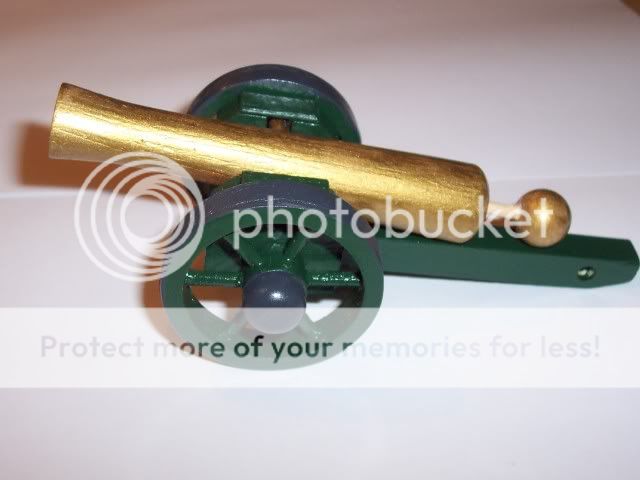
Namely, a toy cannon. (Got a problem with kids playing with artillery? Hey your choice. Use the spoked wheels to make a wagon. But, you might want to avoid this site in the future because there are toy tanks and yikes, a toy bombsight in the queue. Besides, what happens when the wagon gets attacked by dinosaurs? You'll probably need the cannon at that point.)
 My spoked wheels have all been made from wine crate wood. (Don't judge me. I just... um.. happened to find this wood at a beer/wine store.) 3/8" has been the right thickness for the scale I'm shooting for and it has been easy to work with. So far, no broken wheels. If you have a bunch of Brazilian Mahogany laying around to make toys with ...well, have someone on your household staff follow these direction to make your wheels.
- Make sure there is waste wood under your wheel wood and securely clamp your board to your work bench or better yet, drill press. Be sure it doesn't move at all. The hole saws really generate a lot of torque. Be absolutely sure your hands are not anywhere near the saw blade or could slip into or near them if your board does slip.
- Use the 2" saw to drill almost all the way through the board.
- Now flip your board over. Secure it again. Line up you pilot bit and finish the cut.
- Because you didn't cut all the way through, you will get a much smoother disk and it will be easier to remove from the saw. Trust me on this one, let it cool before you grab the disk.The saw can get pretty hot especially if you are working with hardwoods. .
- Now, put your middle school geometry to work. Break out the protractor and draw your spoke lines. (For six spokes that is one every 60 degrees.)
 The hole saws can be seen in the bottom right of the photo along with my high precision $.10 green plastic protractor. What can I say? The right tool for the right job.


0 comments:
Post a Comment