Showing posts with label Tumble Toys. Show all posts

Friday, July 3, 2015

Ladder Toy Repair

I really like toys that have a "trick" to them. Something simple that makes it work but almost seems magical when you watch it in action. Tumble Down the Ladder toys really fit that bill for me.

If you are not familiar with them, it is basically a 90 degree vertical ladder with evenly spaced rungs. A peg or character with specially cut holes and grooves on it is placed on the top rung and then allowed to fall down the ladder one rung at a time.

It is a really pleasing motion and it is fun to watch the peg fall back and forth as it tumbles down the ladder and never falls off until it hits the bottom. The trick is that the peg (or monkey, or clown, or whatever) can't fall to the next rung until it is perpendicular and can't fall out of line once it is lined up. It is a pretty ingenious idea.

Anyway, a few months ago a friend told me a story about how one of her friends had given her and her daughters a wooden tumble down the ladder toy about 35 years ago. The toy had gotten plenty of use over the years and was now a little rough for wear. In short, it was broken. She also mentioned that her grandson has tried to play with it when he visits, but because of missing and damaged rungs, it simply doesn't work.

Since there is nothing sadder than a broken toy except for a broken toy that a kid is trying to play with and can't... I offered to take a look and see if I could fix it.


Here are the specifics....
  • 26" Tall
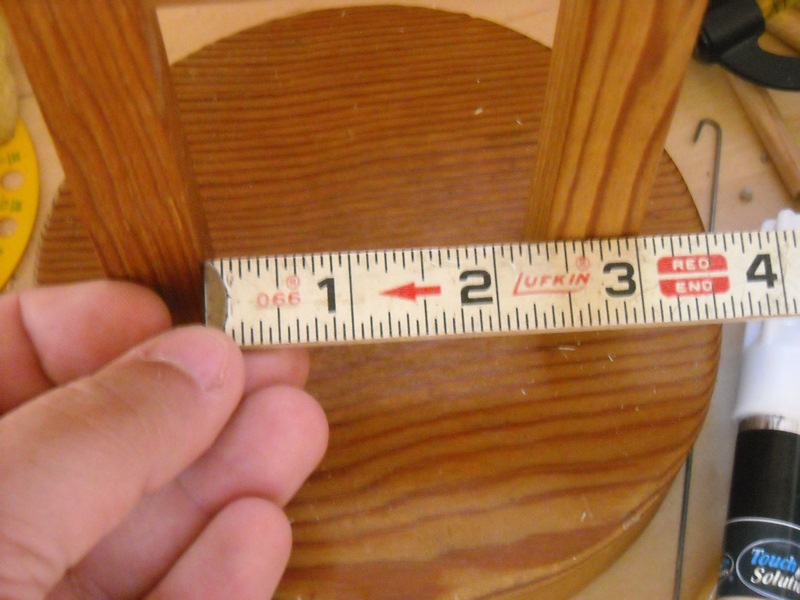
  • Base is 1 1/4" thick and 5 1/4" in diameter
  • The long verticals ate 11/16" x 11/16"
  • The rungs are 10mm (or maybe 13/64"????) tall, 1/8" thick and 2 7/16" wide (well, that's the distance between the uprights.)
  • There is a 2 1/2" gap between each rung.
Somehow I failed to measure the height of the pegs, but my guess is that they were about 3" tall. Long enough so that when they fall to the next rung, they will just clear the rung above before they start to tumble to the next rung after that.The pivot holes are 7/16" in diameter.


So first impression when I started looking over the toy was that it was really solid and really well made. One rung was missing and two were damaged. The rungs are plywood but everything else is solid wood. I wish I could tell you what it was made from, but that would just be a wild guess.

I noticed a bit of a "ghost" on the bottom of the toy. It looks like it may have been the name of the original maker or some sort of brand name. It appears to be adhesive residue.  Needless to say, I am curious as to what this says or means. It is hard to make out but if you know what it is, or have a guess, drop me a line.

JOAR? JOAN?
JEOC? JEOG?

As I said, the top rung was missing and needed to be replaced. I noticed another one was broken enough that it would prevent the peg from falling properly and that one other was starting to break. I figured it made sense to just replace all three.

Broken
Soon to be broken
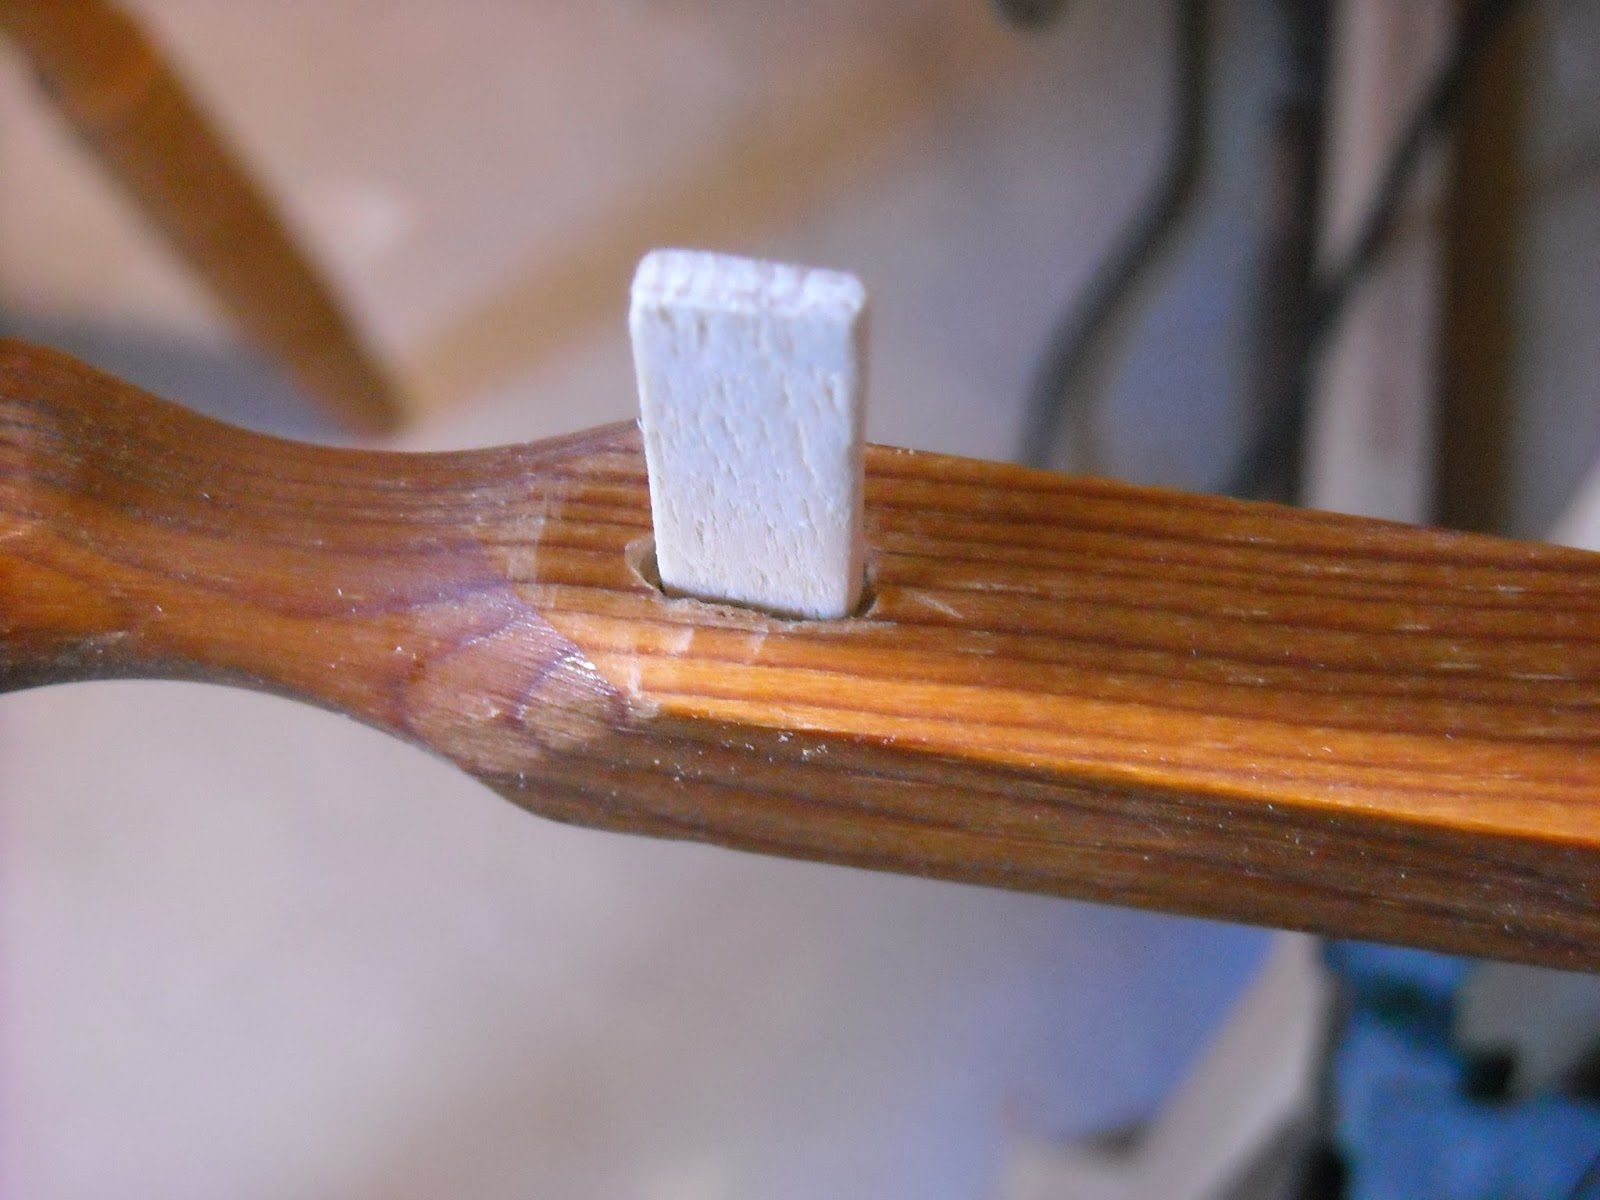
There were a couple of challenges with replacing the rungs. First off the holes (mortises) in the uprights had to be cleaned out of glue and wood without disassembling/breaking the rungs that were fine. The toy was still very solid and I didn't want to break it apart and replace all the rungs. The next issue is that once the mortises were clean, the new rungs would have to be short enough to be slipped into the ladder without breaking anything but long enough that they would still sit firmly in their holes. Thirdly (that may be the first time I ever typed that word... it looks weird) there is only about 2 1/2" of space to work in so it is hard to get at to clean everything out since the other vertical piece is in the way.

No worries. The secret ended up just being patient and remembering the woodworking truism that you can always remove more material but you can't ever add it back on. I got to live the dream sitting at my workbench, listening to the Washington Nationals' game on the radio and drinking a Mexican Coke. Brothers and sisters... it don't get no better than that.

It was great to use my workbench as... gasp... a workbench! Not just a horizontal surface, but a bench designed to help facilitate actual work. It has an end vice and I used some soft dollar store shelf liner to cushion the toy. I mainly used a rotary tool with a very small bit it clean out the holes a little at a time. An Xacto knife and some rather evil looking dental type tools also came in handy.

I cut a little mini rung to check fit. Here is the basic process for us visual learners...

Wood and glue
All clean
Test fit

I did that for all six of the holes. After I was finished I went to test fit an 1/8" plywood rung I made out of the onion of the frugal woodworker world... Clementine Box Wood! As I was test fitting it, I wasn't happy with how sturdy it seemed. More specifically, I wasn't happy with how flimsy it seemed. It didn't make sense to spend the time to fix the toy to only have it break again, so I acquired some 1/8" maple and cut it to size.

I had to experiment quite a bit to get a close match on the finish for the wood. I seem to have the worst luck trying to match finishes. The way it looks on the can is NEVER the way it comes out for me. Anyway, the rungs were eventually finished with Danish Oil and a touch up pen. The match wasn't perfect but it was close enough and I was sorta, kinda, happy about it.

Last step was putting glue in the mortises and slipping in the new rungs. They were a tight fit but all went in without too much trouble. One of the secrets of getting this sort of toy to work is to be sure that the rungs are parallel and equally spaced. I made a little spacer out of.. .Clementine Box Wood! Note the exotic wooden spring clamps I was able to employ. Right tool for the right job.

After it dried all I had to do was test it.

And I tested it a lot :)

Here is the completed toy in action -


It worked fine and hopefully it will hang in there and last for my friend and her grand kids for another 35 years.

Saturday, April 30, 2011

Making a Tumble Down the Ladder Toy

This is one of those toys that is so simple that at first glance, you almost can't believe it works as was well as it does. The peg falls/walks down the ladder, rung by rung, flipping from side to side, powered by gravity. When properly made, it is almost impossible for it not to work.

In doing some cleaning a few weeks back (or more precisely, procrastinating enough that Mrs. Toy Making Dad was doing some cleaning) the ladder part of this toy showed up, with a broken rung or two, on my desk. Several years ago, I had seen plans for this toy in a since forgotten library book. I had built the ladder but put it aside when I got frustrated with trying the make the peg without a drill press or band saw. (I now call that period the "Dark Ages.") I decided after ten years (but with no plans) it was time to finish the toy up.

"When made properly", hmmm, there's the rub eh? Okay. There are two equally important parts to the toy and each has to be made pretty precisely. (I know, "Hey, knucklehead... something is either precise or it isn't" Well, you'll see...)

The Ladder - The sides of the ladder are 12" long by 3/4" wide and 5/16" thick. There is a 1/8" slot routed down the full length of each side. That slot is only 1/8" deep. Although I had built a serviceable jig "back in the day" to make this, future ones will be made with my new router table. The ladder needs to have each rung be the same width, be level and be spaced equidistant. The rungs here are 1/8" wood from... you'll never guess... Clementine boxes!!! Each one is 3/16" tall, by 1/8" thick and 2 1/2" wide. They are glued into the slot starting 1/2" down and are spaced 1 3/8" on center down the length of the ladder leaving the last 2 3/4" of the length free of rungs. (The peg needs space to fall from the last rung.)

The Peg - The second part of the toy is the peg. The secret to how the toy works is that the peg can only fall off of one rung when it is lined up directly over the rung below it. Ultimately, the correct peg ended up being 1 5/8" long by 1" wide cut from a piece of 3/4" thick wood. Drilling on the sides, I made two 1/4" holes, 1/4" on center from the middle of the peg. I then cut a channel just over 1/8" wide from the ends to the holes and then cut angles from the edges to the slots

My first attempt is shown on the left; the correct on the right. The incorrectly made one had holes that were too big and it lacked defined slots. The slots are what prevent the peg from flying off before it can line up with the rung below it. Without them, the toy will not work. The one on the right needed some tuning up with a rat tail file and sand paper to work to get it working smoothly. Just take your time and remember that you can always take more off, but you can never put more back on.

The last thing was the base for the ladder to fit into. I took a 3/4" thick piece of bed slat and cut it 2 3/4" wide by 4 1/8" long. I then drilled two 3/4" holes 3" apart on center. Green paint and spray acrylic to finish it. The 1/2" ladder sides slip in perfectly.

I really like this type of toy and as is usual with me and these sorts of things, there is a bit of history behind it. The first one of these toys I ever had, I purchased in a public market in San Antonio. These markets have stalls with all manner of crafts from Mexico. Now, this toy isn't uniquely Mexican, but the way the tumble peg was decorated, was distinctly Mexican. It had Loteria cards (sort of Mexican bingo) on each side of the peg. This made it fun to see which image would end up showing once the peg reached the bottom.

I see this toy sold fairly often with monkeys decorating it, but I decided to go back to the Loteria images for this one. I found some downloadable images that worked perfectly on the site of a neat soap making supply store called Bramble Berry. (They have a lot of interesting ideas and supplies there.) The images are a free download from their site. It includes a devil and a woman so I felt like that was a fun contrast. I just resized them to fit the pegs, printed them, glued them to the pegs and used a gloss acrylic spray to seal them.


The toy in action:

So here is the final product. It doesn't tumble perfectly every time but it does most of the time. Just like the Sliding Tumble Peg Toy, the fact that it hangs up sometimes actually makes it more fun. It builds a little suspense.

Ten years in the making but only a few hours in the finishing. Totally worth it.


Thursday, March 31, 2011

Making a Sliding Tumble Peg Toy


Part pinball/pachinko board, part tumble toy, I'm really not sure what to call this type of toy. It is pretty cool though and is really easy to make. Honestly, not including time spent looking for pencils (I've got my pencil! Now gimmie something to write on...) and my protractor; the cutting and drilling on this toy took less than an hour.


The toy consists of three main boards; the slide, the brace and the base.  A series of evenly spaced pegs are placed on the inclined slide. A little character rhythmically tumbles from side to side, sliding down the face of the board. It is silly and fun to watch. It also makes a neat sound as he clicks his way down to the bottom.

The majority of this toy comes straight out of John R. Nelson, Jr's fantastic book "American Folk Toys." He calls his "Will-o'-The-Wisp." I pretty much followed his excellent plans and don't want to give the impression that they are mine. What I will say though is that the basic idea is simple and robust enough that it is pretty easy to see how it could be expanded. A wider or longer board with more than two rows of pegs would be easy to see and maybe have Will race a friend or two.


The slide is 3/4" thick, 2" wide and 18" long. It came from my now dwindling bed slat stash. I drilled 3/16" holes every 1 7/8" down the length of one side and then alternated holes the same distance down the other side. There is a gap of 1 3/8" on center between the rows. The holes are about 3/8" deep. I then cut 15 pieces of 3/16" dowel 1 1/4" long. These are the pegs.


The base and the brace are 3/4" thick and 3 1/2" wide. The base is 5 3/4" long and the brace is 5" long at its longest and cut at a 60 degree angle across its width. I came up the angle based on testing the toy a few times. (The end of the slide is also cut at an angle to match into the base.) Everything is glued together once the angles have been determined and cut.

"Will" was cut out of a piece of 3/4" scrap. I followed Mr. Nelson's plans for his shape and drilled 1/4" holes at angles and inserted 1/4" dowels to make his arms. A few test drops with quick trips in between to the belt sander to adjust his arm lengths got him into tumbling form surprisingly quickly. I do have to tell you though, that reaction in my family to Will's face has been... um... mixed at best. "Demented Tear Drop Dude" and "Creepy Rain Drop Guy" are two of the nicer names my always supportive and never sarcastic family have given him. (I don't care... I love him like the two dimensional wooden son I never had.)

Will works well. He falls through without getting stuck maybe about 80% of the time. Honestly, it makes it more fun that he doesn't work every single time. It gives a "Will he make it..." bit of suspense.

I decided to try and make my own tumble guy to go along with Will. A few months ago I purchased some peg people from www.craftparts.com. They are 5/8" in diameter and 1 11/16" tall. (I know... 11/16ths... Maybe that whole metric thing isn't sich a bad idea...)

I did get smart with drilling him though. Trying to hold a round peg, at an angle, while drilling with a forstner bit is just asking for trouble. I adjusted the table on the drill press to the desired angle (thanks to a quick how-to from Crawfish) and then made a quick jig to hold him in place. It looked a bit like a scene from a Bond movie, but it got the job done. ("You expect me to talk?" - "No, Mr Toy Making Dad Peg Guy.. I expect you to tumble down an inclined plane!)

Anyway, after drilling him and fitting his 1/4" dowel arms, I tested and adjusted him until I was happy with his tumbling consistency. Craft store paint, acrylic gloss spray and some googly eyes finished him off.
Little guy unpainted on the coffee tableLittle guy painted... on the surface of the sun.
(At some point I'll learn how to take pictures)

Here is the toy in action:


So, a really simple toy. Pretty easy and quick to make even with just hand tools. (You would want to get the pegs straight in at 90 degrees though.)  I had waited years to make this toy thinking it would be hard to get to work properly. I was wrong. It is a very quick and rewarding project that works surprisingly well almost every time.

Just Saying...

While we don’t necessarily need more objects, we just might benefit from more making.
- John Dunnigan

Followers

About Me

My Photo
Regular guy who likes to make stuff who lives with a very patient wife, three daughters and three cats.