Monday, February 21, 2011

Making a Toy Bombsight

I know... a toy bombsight. Crazy huh?
Not real PC.
I must be some sort of a warmonger.
Perhaps a pawn of the military industrial complex.
Or maybe someone who likes making toys that are fun to play with and maybe have a little history behind them.

Okay, there is a lot of history to this toy for me and most of it is very personal. So bear with me for a paragraph or two and then I'll get to the toy.

The whole idea for this toy I owe, like so much else in my life, to my dad. My dad grew up during WW2 and I always loved listening to his stories about the toys he played with as well as the world he grew up in. A little boy with tin soldiers and balsa wood airplanes playing on the floor of his parent's living room listening to the radio is an image I really like having of him. His favorite radio shows were "Captain Midnight" and "Jack Armstrong, The All American Boy." He loved listening to the shows and he loved sending away for what are now referred to a "premiums." You know, the whole "Send in x boxtops and one thin dime for..." whistles, spy scopes, decoder rings, all that cool stuff. But without a doubt, the toy he recalled most fondly was his Jack Armstrong Bombsight.

Jack Armstrong ran on the radio for almost 20 years and in a way was part of my youth as well. There was an attempt to make a Jack Armstrong cartoon series during the 1960s. The producers had some test sequences animated but ran into difficulty securing the rights to the original name. Undaunted, they reworked the idea a bit and produced one of the most wicked cool cartoons of all time: the original Jonny Quest. (The end credit sequence of African warriors throwing spears at people in a hovercraft and against the side of a plane is actually some of the Jack Armstrong test footage. That's why it isn't in any Jonny Quest episode.)

Jack Armstrong was a bit of marketing phenomenon and the premiums from the show are highly sought after collectables. Reproductions of the Jack Armstrong famous WW2 airplane premiums are available. Original bombsights show up on auction sites. The prices are... well, what do you expect a guy who is so cheap he takes apart clementine boxes to reuse the wood to say?

Here is what the original looked like. It had three bombs and a set of paper targets.

(Image used with the permission of www.hakes.com a great source for popular culture collectables.)


Which brings us to my bombsight. About seven or eight years ago I was trying to come up with a Christmas gift for my dad. At the time I couldn't find out much about the toy on the internet although my dad had told me enough about the toy that I had a general idea on how it should work. Feeling confident from knocking out some toys from other people's plans, I decided to try my hand at making a bombsight of my own design.

I knew that you looked through a sight into a mirror that was angled so that you could see straight down. You then turned a flat disk on the bottom of the bombsight until a small bomb lined up with a hole on the disk and dropped free onto paper targets below. Here is the general idea I worked out:
For the eye piece, I somehow I drilled a 7/8" hole through a 1 1/4" dowel (a piece of old closet rod actually) without a drill press. I also think I did it without a 7/8" drill bit... but that is another story. I then glued it to a simple wooden box that I made out of scrap pine and poplar that had been given to me by a friend who is a carpenter. Inside the box is a 1 1/2" square craft store mirror angled at 45 degrees. When you look throught the dowel sight, the mirror turns you line of sight 90 degrees.

The bombs and paper below are reflected in the mirror.


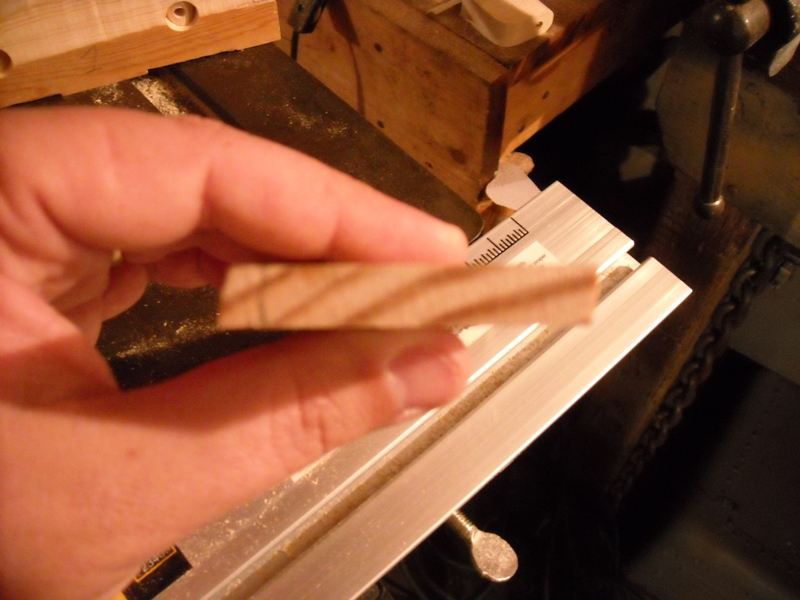
The bombays are three 5/16" holes drilled into a solid block that fills the inside of the sight except for the areas used for sighting the toy. The holes do not go completely through to the top of the block in order to prevent the bombs from rattling around too much.  A 2" wood disk with a 5/16" hole drilled in it rotates around a 1/4" dowel through the center of the block. As that hole lines up with a bombay hole, the little bombs can then drop free.

Looking at the bottom of the sight, the bombay holes
are at 6, 9  and 12 o'clock.
A small wooden "nut" was glued in place to prevent
the disk from falling off but still allowing it to rotate freely.

The bombs are simply 1/4 dowels that I shaped to give a general bomb like appearance. I shaped them on a grinding wheel.


When I look at it now, I can see every mistake. What can I say, it was pre-drill press and pre-beltsander. In general, I wouldn't make something so rough now. However, no regrets. My dad was really happy with it and thought it was pretty cool. I saw him take it out a few times to show visitors and seeing him happy with it, made me happy.

This probably won't be found on the crafts pages of "Overly Sensitive Parenting Quarterly" but after my dad passed away it found its way to a shelf in my house. When I look at it I immediately think about him and his great childhood stories. The bombsight was my gift to him, memories of him are his gift to me. Thanks Dad.

Now, if only I had some paper U-Boats to sink...

Sunday, January 16, 2011

Making a Toy WW1 Tank (German A7V Part 4)


With the sides, front and rear attached and then belt sanded smooth; it's on to finishing up the tank. The last pieces to be cut are the cupola, some support pieces for the tracks and the air vent plates that cover the dowel holes on the top of the hull.

The cupola was straight forward. I just took a piece of scrap bed slat wood the right height and cut it into a rectangle with the bandsaw set to a 10 degree angle. The piece was fairly small. I used the rip fence and made sure to keep my fingers clear as I used another board to push it through the cut. I then took small pieces of 1/8" plywood (from clementine boxes... of course) and carefully cut little squares for the vision ports.

The wheels are a pretty tight fit. They are 1 1/4" wheels that I purchased pre-made. In future versions, I might experiment with using single very wide rollers instead of wheels to make it a little steadier. I put a "clacker" gear on the rear wheels of this one. It isn't as wide as the one on the British tank because the space is so tight, but still, it works well. I also put little blocks at the front, rear and middle. Besides helping support the tracks, the middle block is where I attached a small triangle of stiff vinyl that is at the same height as the center of the clacker gear. It is what makes the noise as the tank is pushed across the floor.

The air vents were just more clementine box wood cut to shape with their edges beveled smooth. They were glued over the holes in the top of the hull to finish things up.

In looking at pictures of A7Vs, there is a lot to choose from in terms of how to paint it. I decided to go with a straight forward grey with single Iron Crosses on the front and sides. That look seemed to capture the toy look the best.

The paint is craft store acrylic with a clear gloss spray acrylic finish. I hand painted the Iron Crosses on the sides and front using a little stencil I made. I'm on the fence as to if I would do it that way again. It takes awhile to do and the results aren't perfect (but hey, what is right?) Decals or stickers are an option, but they can get peeled off or yellowed in a way that I don't think the paint will. It might just be that I need to practice a bit more.


A7V from the frontMaxim guns at the rear


The completed toy tank

So, here is a quick semi-murky video of the finished toy. The clacker works and all the guns rotate. There is a bit of a squeak in there that I probably could have tracked down... but let's just pretend like that is by design.


So, all in all, this was really fun to design and build. I'm pretty happy with how it came out and it was well received. 

Friday, December 31, 2010

Making a Toy WW1 Tank (German A7V Part 3)


Hookay, entering the home stretch now. The rear of the tank has the same angle cuts as the front, but you don't have to worry about the center cut and dowel plug for it. Instead, the rear had two machine guns, one on each side facing straight back.

This just shows the layout for the cut. I taped it securely to a board before I made these cuts and the angle cut on the bottom. Making toys - fun. Hurting fingers - not so fun.


For all six firing ports (two on each side and two at the rear), I marked a line at the proper height on the armor and then marked the center where the gun will be. I took a 1/4" forstner bit and drilled through on each side of the center line.


I then took a 1/4" rat tail file and joined and smoothed the holes to make them into one oval opening.
 
I painted the pivot dowels and the wood around them black before the armor was glued into place. It would be more difficult if I waited until after the tank was assembled.

I test fitted the armor and put sample gun barrels in place to make sure that they could rotate properly.

I glued and clamped the side armor first and then the front and back. The fit didn't need to be perfect because the belt sander is going to take care of any overlaps. I was also able to use the original main gun hole as a convenient place to seat a clamp.

Like I keep saying, I'm not trying to make a scale model, I'm making a toy. However, there are certain aspects of the tank that capture "the look" and I want to try and capture them when practical. The German machine guns that were on the tank were copies of the original Maxim machine gun. (Oh hey, Hiram Maxim the inventor of the modern portable machine gun also invented the mouse trap. Seriously. Look it up. Pretty sure he had nothing to do with the magazine "Maxim" though... ) The tiny part sticking out of the bottom is the barrel for the machine gun. The large cylinder surrounding it is actually a metal jacket filled with water to help cool the machine gun barrel. Without it, the barrel would heat up rapidly and cause the weapon to jam or become so hot that it would literally start to melt and droop. So to capture that "look" I used 3/16" dowels for the water jacket and a small piece of 1/8" dowel glued off center to be the barrel.

I used the pattern for the tracks and taped them to some wine crate wood.  The space above the pattern is what will be "hidden" under the armor and glued to the bottom of the chassis. Future versions will be a little larger so that I won't have to cut the wheel wells out of the chassis piece. I measured and drilled 5/16" holes that the 1/4" dowel axles will fit into.


On to Part 4 - Final Assembly.


Tuesday, December 21, 2010

Making a Toy WW1 Tank (German A7V Part 2)


As I said in Part 1, this is a proof of concept/first try and although I had more than a general idea going in, I've found that a couple of things had to be done differently than I first expected. No biggie. Seeing what works and how to do it better is just part of the process. (And dare I say... part of the fun.)

I found that I needed to change two things once I moved from paper and pencil to wood and glue on this toy. The first one is the most obvious - the main gun.


This is how it looked originally with the side armor clamped in place just to check the fit. The front and backs are from a 2x3 cut to size with the grain running side to side. I drilled a pilot hole and then used a scroll saw to cut the hole for the gun and made the sloping cuts with a band saw. It wasn't that this was bad; it just wasn't as good as it could be.


The 3/4 hole and dowel at the front of the hull worked well, but the more I looked at it, the less it looked right. The dowel needs to be farther forward to more closely match the original look. Now, like I've said, I'm not trying to make a scale model, but I think having the curve of the gun mount showing and being far forward really helps to capture the look of the original tank.

So the second front (wait, that's a WW2 reference...) used a slightly thicker piece cut from a 1" thick board cut to the correct height. I drilled a 1/2" hole about 1/16"-1/8" from what will be the edge that is glued to the hull. I used a forstner bit and cut from the bottom of the front block to within about 1/8" from the top of the block.  Clamp everything securely. Be careful with the bit (it is wicked sharp) and be sure not to drill all the way through the block.

Now with that hole drilled, I cut the angles from the center to the sides using the bandsaw. I taped the piece firmly to another larger block for all these cuts so that it would be held perpendicular to the blade and my fingers were well out of the way. With the piece on its side, I made multiple cuts with the bandsaw to expose the area where the main gun and the dowel that holds it will be exposed.

(Well, time for me to act like a dad and give some advice. Look, be smart. You can buy new wood. As of this morning, you can't buy new fingers. Take your time, keep your fingers away from the cutting path of the blade and if that little voice says, "I don't think this is such a good idea..." LISTEN TO IT!)

To get the needed trapezoid shape, I kept it simple by laying it flat on the bandsaw table and cutting straight lines with the piece held at an angle. Since that left the edge a little thicker at the top than at the bottom, I used the belt sander to remove the excess. Then, with the gun turret hole opened and sanded, I put a 1/2" dowel with a 1/4" hole drilled in it to hold the gun. The pivot dowel was sanded so that it would rotate smoothly and cut short enough so that I could put another 1/2 dowel under it to 'plug' the hole. The plug isn't sanded so it has a pretty tight fit but I did glue it.

After the plug dried, I taped the front piece to a thick block and cut the downward sloping angle on the front with the bandsaw. I cut a piece of 1/4" dowel for the barrel of the main gun and now the new front is finished.

The other change to the design was where the chassis attached to the hull. Basically, I realized that the tracks needed to be taller so that the wheels wouldn't brush against the bottom of the chassis. However, if I did that the tank would stand too tall for scale. I decided to cut wheel wells out of the chassis to give enough clearance. On the next tank, I'll just make the hull a little less tall and the tracks a little taller to make up the difference.

Wow, that's confusing. Look, here is what happened -


The armor sides sit at about a 10 degree angle. I just adjusted the angle on the table saw and cut the tops of the hull and the sides of the chassis. I then glued and clamped the pieces together. (Next time, I'll just glue an over sized chassis piece and cut the 10 degree angle through both pieces at the same time.)


The armor sides, like the chassis, are made from 3/8" wine crate wood. These also have a 10 degree bevel on them so that the tops and bottoms will be horizontal once they are glued to the body of the tank.
The front and back edges of the armor plates don't have an angle. The front and back pieces will glue flush up against them.


Don't worry if the armor overlaps the top, front and back of the hull. As long as it isn't too great, a quick visit to Mr Belt Sander will make everything nice.

On to Part 3 - Assembling the Armor Sides and Hull

Saturday, November 27, 2010

Making a Toy WW1 Tank (German A7V Part 1)


A few months ago I made a toy British WW1 tank that was a big hit with the kid it was a present for. However, Toy Making Dad is haunted by the bittersweet vision of a kid having to play with a toy tank with no enemy tank to fight against. Seriously, where is the fun in making "PUUURCH!" noises from the main guns without something for them to "BLAMMM!" against on the other side? So, an adversary is in order and the only German designed tank to see action in WW1, the Sturmpanzer-Kraftwagen A7V,  is the obvious choice.


First, a couple of quick historical notes (because my rule is that I get to use my BA in History once a month no matter what.) The British and French both made thousands of tanks in WW1 but for a lot of reasons the Germans did not. Building these tanks represented a ton (hehehe a tank joke) of effort and resources for what was seen as minimal gain. The tanks of the time were also mechanically unreliable and far from the fast moving seemingly indestructible beasts that are in everyone's minds now. The Germans only built around 20 A7Vs during the war and actually used far more captured British tanks that had broken down or had been knocked out and repaired.


So, I could make another British tank and paint it like the Germans did. Okay, that would be sorta fun. However, it wouldn't advance the science of making toy tanks out of 2x3s, wine crates and clementine boxes, now would it?


Okay, while the British tanks of WW1 have that "land battleship" vibe about them, the A7V has the all too familiar "The barn just came to life, sprouted half a dozen machine guns and is crawling down the street" look. A thing of beauty it is not but it does have its fine points. Chief among them is that it positively bristles with guns. There are six of the German version of Maxim machine guns, two on each side and two in the rear. The main gun is a captured 57mm gun in the front of the tank. Those cannons had been captured from the Belgians and Russians earlier in the war and used as anti-tank guns as well as the main armament of the A7V.


So, some things to keep in mind before I start designing and building:
  • It is a toy, not a scale model. I want to keep it simple and relatively easy to build. (Which also means easy to repair. It will probably see some rough play.)
  • I want to keep it close to the scale of the British tank.
  • The guns are the center point of this toy and we need to come up with a way where all are present and can move in some sort of way
  • A clacking noise as it is pushed would be nice.
 (One other note. I had sketched out numerous ideas for this toy before I started but once I started making saw dust, different and better ways to get the same result became obvious. So, not all the pictures will exactly match "the order of assembly" that the toy will ultimately have when I build new ones, but it is what it is; a proof of concept.)


Just like I did for the British tank, I grabbed a plan for the A7V from The-Blueprints.com and sized it to scale in PowerPoint. Looking at the true dimensions of the tank, it should end up a little taller and not quite as long or wide as the British one. The British tanks is about 8 1/2" long so to match the scale my German tank needs to be about 7" long.


I'm using a 2x3 as the "hull" of my toy. It will be the center of the toy with everything attached to it in some manner. When the toy is finished, very little of the hull will actually show. The front and back of the tank will be about 1/2" thick so that leaves six inches for the hull. I traced the pattern on the block and marked the machine gun locations. The hull is taller than it needs to be here. Ultimately it will only be 1 5/8" from its highest point to the bottom. The cupola will be added later.


I marked out the locations for the main gun and each of the machine guns based on the pattern. I used a 1/2" forstner bit for the machine guns and a 3/4" one for the main gun. I made sure that I cut the holes to be deep enough so that they can securely hold a dowel the same diameter that will serve as the swivel for the guns. (Trust me; it will make sense in a minute.)


I'm finally getting smart about these things and have realized that it makes sense to work on a couple of toys of the same kind at the same time. Most of the time in toy making is spent in setting up cuts as opposed to actually making the cuts. Here are two hulls (creatively labeled "1" and "2") with their top holes drilled. Hull #1 already has the front and back slope cut. Honestly, I jumped the gun (so to speak) on that one and could have waited until the next step was done.


In another live and learn moment, I cut a 10 degree bevel along both sides of the top of the hull before drilling the side holes that will allow the guns to stick out. The bevel is so that the armor sides will hang at the proper angle and give the tank the correct shape. Not really a problem, but next time, I'll drill the holes first. These holes are the same diameter as the as their respective gun mount dowels and are centered on where the guns will poke through the armor plate sides.


The next steps are easy. Just pop a dowel of the appropriate width into the opening and mark where the gun should be centered and where the top of the dowel needs to be cut so that it will not protrude above the top of the hull. Before you cut the dowel to length, drill a hole into it that will hold the dowel that will be the guns. (I used 3/16" for the machine guns and 1/4" for the main gun.)

Don't worry about the angle, just cut the dowel flat at the lowest point.Yes, the jig is made from the corners of a clementine box.
This is just a test fitting and the guns are not cut to length. Still, you get the idea that all seven guns will be able to move independently.


Just Saying...

While we don’t necessarily need more objects, we just might benefit from more making.
- John Dunnigan

Followers

About Me

My Photo
Regular guy who likes to make stuff who lives with a very patient wife, three daughters and three cats.